Stop Licking Lola

Woah what year!  It’s been a crazy time here at the farmhouse, and I wanted to invite all of you to come join me in the journey 🙂 Nate and I are now co-running our new blog, Stop Licking Lola, which is dedicated to telling our story and sharing with you our adventures.  I still have a blog over at Knitting Naturals too, but I’m keeping that one more focused on business stuff, crafty DIYs, recipes, and the like.  Stop Licking Lola is (in my opinion) more like Homegrown Joy, a fun and casual way for me to share with my followers all sorts of things that happen in my life, with cool pictures and stories.

Please stop by and subscribe to get updates.  I know at least 73 of you signed up for this blog 😀 I expect to see you all over at Stop Licking Lola too!

On to the next adventure!

IMAG0148

Going Through Changes

As you may have noticed, I’ve not posted very much lately.  I’m actually officially announcing that I’m taking a break from this blog to focus my time and effort on building Knitting Naturals.

Slide1

I’m working on a series of YouTube videos to promote the shop, showcase new products, and provide tips and suggestions on making other ecofriendly choices in all aspects of life.

My goal is to have at least 50 items in the next month or two (before summer starts in June), which will be pushing myself since I’ve been picking up more hours at my day job.

I do encourage everyone here to visit and follow the blog on Knitting Naturals though!

I plan to return to this beloved blog, and I thank each and every one of you for your support.  I never imagined that people would actually read what I have to write, but I’m very proud and happy with where things have gone 🙂

Picture

I wish all of you the best of luck on your own projects, and will see you soon (hopefully over at Knitting Naturals!)

Awards!

I was honored enough to be nominated by Millie at Millie On Her World for the Reader Appreciation Award, so I’m sharing a bit of the love!

reader-appreciation-award1

Rules

  1. Link back to the person who nominated you.
  2.  Attach the icon to your site.
  3.  Answer the attached questions.
  4. Nominate six bloggers who you feel deserve this award and notify them about their nominations.

Questions

1. What is your favorite color?

Green–it’s refreshing and reminds of the wonders of nature, and the possibilities for new beginnings (just like the new green every spring)

2. What is your favorite animal? 

Tigers by far–specifically Amur Tigers

3. What is your favorite non-alcoholic drink?

Chocolate Milk

4. What is your favorite number?

7

5. What is your favorite day of the week?

Saturday

6. What is your favorite flower?

Snapdragons

7. What is your passion?

Doing better for the Earth…and KNITTING!

8. Do you watch television?

Not really, though I love Good Eats and The Office (more so at the beginning of the series, but I’m still a loyal fan)

9. Who is your favorite author?

I love all of Dan Brown’s books, though I don’t have a single favorite author, just a lot of favorite books and series

10. Do you like 80s movies?

Of course!  I am a product of the 80s myself, so how could I not?

11. How do you like your eggs?

I used to like them in a cheese omelette, but I’m no longer eating animal products.  Plant-strong for life!

12. When did you discover blogging?

I guess Xanga was like my first blog, but it was more of an adolescent personal journal than what I would consider a ‘blog’

13. Why do you like to blog?

I can share ideas with people all over the world!

Here are those I’m nominating:

Megan’s Creative Blog

Jilly Bean 2

Eyelah

Eva M Designs

Jessly in Cleveland

Chit Chat and All of That


Are You on Auto Pilot?

Do you ever find yourself doing the same things day in and day out, without much thought or effort, like your life is on auto pilot?  Now don’t get me wrong, I think routines are fantastic.  They give structure and comfort to our lives, which can certainly reduce your stress when you don’t need to put a lot of thought into what you have for breakfast or what route you’ll take to work.  I admit I actually look forward to the same awesome bowl of oatmeal with a baked apple and cinnamon in the morning.

But I think often times we put too much of our lives on auto pilot.  I realized this week that I’m bored and unfilled when I go to bed at night.  I get up and go through the same morning routine every day, which I have timed down to the minute.  I go to work the same way, come home and do the dishes, eat dinner, watch some show on my computer, maybe knit a little, and end up going to bed early.  I post the same 3 blog posts every week, buy the same foods at the grocery store, go to the same websites every day.  I don’t feel challenged or inspired by my daily encounters–and while I am very content and have an overall sense of internal calm, I want to feel more alive.

I want to do something fun and exciting, even if that’s just taking a long walk on a different path than usual, or trying some new recipe with an ingredient I’ve never used before.  I left my previous job to enjoy life more, to be less stressed, and to create more happiness in my life and my relationship.

I’m at the point where I need to re-discover and focus on that goal, and I challenge you to do the same.  Are you bored with your daily routine?  Are you on auto pilot?  Try something new today–put together a new outfit from your closet, meet an old friend for lunch, sign up for that class that you’ve been interested in, or help teach someone something new.

If all else fails, simply take a moment to stop, breathe, and enjoy the moment.  Watch the cars drive by the window, close your eyes and focus on your breathing, or watch your dog (or cat) in their own little world.

Do something, anything, different from the ordinary in order to get more out of life and go to bed feeling like you actually lived your life that day, instead of just wandering through it in a haze.


Tuesday Tutorials – No Sew Fleece Blanket Edging (Without Tying Knots!)

You often see the easy no-sew fleece blankets pop up every winter, usually with the edge strips tied in knots.  Tired of tying all those knots?  Grab a crochet hook and try out this very pretty and different edging technique!  This makes a more sophisticated edge worthy of any gifted blanket, all thanks to Nebraska Views.


Crochet Edging for Fleece Blanket

Step 1  I trimmed the selvages off and straightened the ends.  This part is not difficult as they don’t have to be perfect rectangles.  The fabric always is wiggly so who is going to know if it is a llittle off square one way or another.

 IMG_4536
 Step 2 – Cut 1” slits around the entire edge and a 2” square out of each corner.  The 1” cuts are 2” deep.  I stuck a piece of painters tape 2” in from the edges of the fleece, laid the straight edge of the fleece on one of the lines of my cutting mat then used the rotary cutter to eyeball cutting every inch.  If it did not come out even in 1” increments I eyeballed to the end of where I IMG_4537was cutting and either added a little to each 1” fringe or subtracted a little so I wouldn’t have a really skinny or really fat strip at the corners.  I did cut through 2 layers at a time and it was no problem to keep my cuts even.  The tape really helped and cutting into it a little at times didn’t dull the rotary cutter like hitting the edge of a ruler would.  I cut the corners out with a scissors to avoid overcutting into the side strips.
After this step is done the rest could be finished sitting in my favorite chair and watching TV,  listening to music or an audio book.  These fleece throws are so easy even kids can do the edge treatment but would do the fringe cutting for them to keep them safe from those sharp rotary blades.  How about making a Christmas gift for grandparents or in my case I have gifts for my family for Christmas….OK, now on to the finishing of the edge treatment.
IMG_4539
Step 3  Cut a small slit about 1/2” to 3/4” from the end of each strip with a scissors.  These small clips into the fleece are only about 3/8” long.  As you can see in the photo I just folded over the end and snipped to get the slit I needed.
IMG_4541
I had a large crochet hook to use for the next step.  It is a size N but the size isn’t important, just need something that it will go through the slits I cut and be able to grab the next strip and pull it through.  The original web page had them using a looped paper clip  or wire for this step.  Check out the photos on that page.
Step 4  Starting in the center of one long side the crochet hook is slipped through the slit of one strip and into the one next in line. ( I am a left handed person so I am working from left to right – if you are a right handed person you will be going from right to left.  If you can’t figure it out check out the photos from the blog I learned this from here.  I was going to photograph it for right handed people but decided no, I am always having to transpose everything for myself from right handed directions so this time right handers would have to transpose and  I would just show how I did it.  If it were a complicated procedure I would have made it easy but since it is really pretty simple and self explanatory through the photos it stays left handed.)
The second strip is pulled through the slit of the first one and now the second one is on the crochet hook.  Next put the crochet hook through the slit in the next strip and pull it through….keep doing this all around the throw until you only have one strip left.

IMG_4548Step 5 The corners are treated no differently than the sides.  As the strips are pulled through and around the corners you will get a rounding of the corner and can keep going along the next side.  No fancy stuff just the same thing you have been doing on the sides.
Step 6  The last strip is cut in half to make two smaller strips.  Cut a slit in the first strip close to the body of the throw and pull one of the half strips through that slit from the back then hook the other small strip and pull it through the last one you hooked as you worked around the throw.

  IMG_4549 IMG_4550

Tie the two smaller strips together in a double knot and try to hide it under the back if you can.  I had trouble with this part and decided if the knot showed a little that was OK.  The ending is the only place where you have a small knot.  If you have ever used those other kind of throws made with two layers and knotted fringe you know how uncomfortable it is to lay on those huge knots.  With this edge the only knot is small and hopefully pretty invisible and not lumpy to lay on.

IMG_4551 IMG_4554

Monday Munchies – Potato Lentil Soup

Potato Lentil Soup

potatosoup 2260 thumb   Not Your Average Potato Soup

Ingredients:

  • 2 tsp coconut oil (or other oil)
  • 3 garlic cloves, minced
  • 1 tsp yellow mustard seeds (optional, but recommended)
  • 1 small onion, diced
  • 3 celery stalks, diced
  • 4 cups diced Yukon Gold potato (about 1.4 pounds)
  • 1 cup uncooked green split peas, rinsed
  • 5 cups vegetable broth
  • 3/4 tsp smoked paprika, or to taste
  • 1 tsp dried oregano
  • 1/2 tsp dried thyme
  • 1/8-1/4 cayenne pepper, to taste
  • 1/2 tsp chili powder
  • fine grain sea salt and black pepper, to to taste
  • Fresh parsley, for garnish (optional)

1. Add oil to a large pot and sauté the garlic and mustard seeds for a few minutes over medium-high heat, until the mustard seeds begin to pop. Be careful not to burn them. Add in the onion and sauté for another 5 minutes, or until the onions are translucent.

2. Add the celery, potato, split peas, broth, and spices. Stir to combine. Bring to a boil and simmer on low-medium heat uncovered for 20-30 minutes, or until the split peas are cooked through and the potatoes are tender.

3. With a ladle, carefully transfer about 3 cups of the soup into a blender (leave some of the pouring hole ajar so stream can escape). Starting at a low speed, puree the soup until smooth and pour it back into the pot and stir. (Note: You can also use an immersion blender if desired.) Cook for 5 minutes and then serve immediately with fresh parsley and a pinch of smoked paprika, if desired.


From Oh She Glows

Friday Features – Penelope of UniqueP Crochet

Friday Features are all about meeting the talented artists and creators of hand crafted goods to share their stories and bring to light the value and beauty found in handmade.

Today’s feature is all about Penelope from UniqueP Crochet on Etsy!

Tell me about yourself and your shop.   I love being silly for my little boys.  I also love to hunt fro the perfect gift for my beloveds and make unusual gift wraps for it.

How did you start, and why did you choose your craft? How much experience do you have so far?  I couldn’t imagine how creative crochet is (my aunt tried to teach me when I was a little girl, but was not successful). 3 years ago, a friend let me know about internet tutorials and the interesting designs on the net. Once I tried I was hooked and now I can’t stop.
Crocheted Shark slippers

What influences your work from your life or city? (or anything else that influences you)  I’m most inspired by my family, and especially my boys.  That’s why I have so many boy’s projects in my shop.  As you can see, my shop is a little of this and a little of that because I get bored easily and I like to create something new every time. Most of my patterns are something I needed personally (a toy for my boys, a gift for a friend’s baby etc).

What do you do when you need a little bit if inspiration?  Actually I do nothing because I can’t stop ideas popping out of my head.  Sometimes I go crazy because I have so many ideas but only two hands to accomplish them.
Funny Crocodile hat Eating your Head-Crochet pattern
What is your best achievement?  My best achievement…is everything I have made that has brought a smile to the face of the receiver of the gift.
What does handmade mean to you?  Creativity and diffusion of  tension. When I have to think or clear my mind I need to do something with my hands.
Do you also offer custom made items? Is it something you like to do?  I  love doing custom made items because it is a challenge for me. For now though I’m more concentrated on creating my patterns because I want to give others the chance to make precious, funny, or silly projects.
New Baby Gift Set crochet pattern-PDF-Permission to sell finished item
What plans do you have for the future of you business?  I hope people find my projects  interesting and give me a boost to continue coming up with unique patterns.
Any advice for others looking to sell their handmade items?  My only advice is if you believe in your crafts go for it and sooner or later people are going to appreciate your work. Be patient!

Many thanks to Penelope and be sure to check out the rest of her shop!

Stay tuned for more Friday Features, crafty tutorials, and other joyous posts!  If you’d like to stay up-to-date on happenings here at Homegrownjoy, follow this blog, like us on Facebook, or follow on Twitter.  Thank you!

End of Season Sale!

Being the last day of February, I’m starting to prepare for spring and summer items in the shop.  But first I’ve gotta get rid of all this winter stuff!

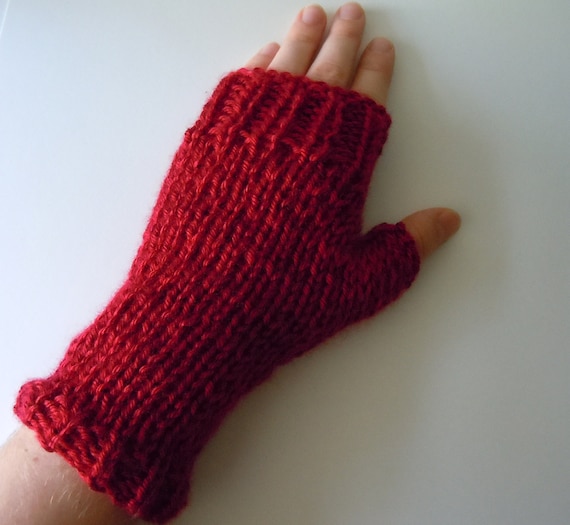
40% Off - Hand Knit Fingerless Gloves - with or without White Pom Pom

Welcome to the End of Season sale, where all ready-to-ship items are 40% off! (Yes, it’s awesome, I know.) So, if you’ve been admiring anything in the shop, now is the time to pick it up before the sale ends.

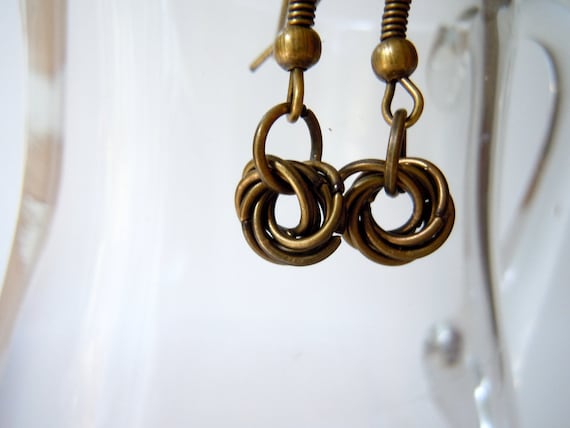
40% Off - Chainmaille Earrings - Bronze Mobius Flower

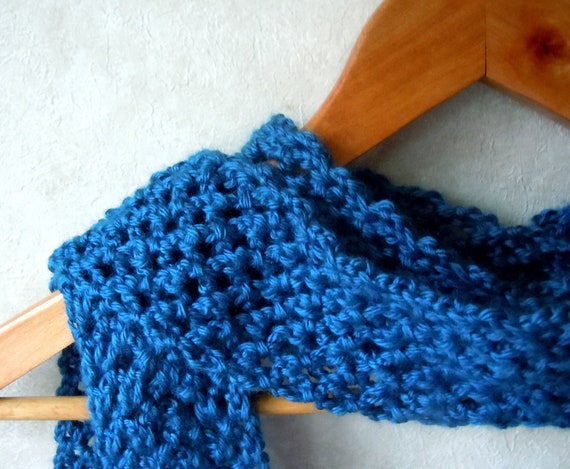
I’ll also be featuring a different item in the sidebar everyday for the sale, so check out the shop to see if anything catches your eye!  Start stocking up on scarves for next year’s holiday gifts or get yourself a cool new pair of earrings just for the heck of it.

Go crazy at LittleNoteCrafts!

40% Off - Long Crochet Fashion Scarf - Open Lace Design in Ocean Blue

Tuesday Tutorials – Custom Color Chalkboard Paint

I think chalkboard paint is amazing.  You can turn any surface in your house into a reusable message board.  Not to mention that there is something fun and youthful about chalkboards.  I think it reminds us of our young school days, when life was a lot less stressful.  The problem with most commercially available chalkboard paint is that it only comes in black and green (which makes sense, that’s what most school chalkboards are anyway), but what if you want more pizzazz in your life?  What if black or green simply does not go with your room decor?

Martha Stewart to the rescue!  Mix your own custom chalkboard paint colors with her simple how-to.  Now you can start thinking about what to paint this weekend…

Custom Color Chalkboard Paint

Start with flat-finish latex paint in any shade. For small areas, such as a door panel, mix 1 cup at a time.

1. Pour 1 cup of paint into a container. Add 2 tablespoons of unsanded tile grout. Mix with a paint stirrer, carefully breaking up clumps.

2. Apply paint with a roller or a sponge paintbrush to a primed or painted surface. Work in small sections, going over the same spot several times to ensure full, even coverage. Let dry.

3. Smooth area with 150-grit sandpaper, and wipe off dust.

4. To condition: Rub the side of a piece of chalk over entire surface. Wipe away residue with a barely damp sponge.

Monday Munchies – Garden Quinoa Salad

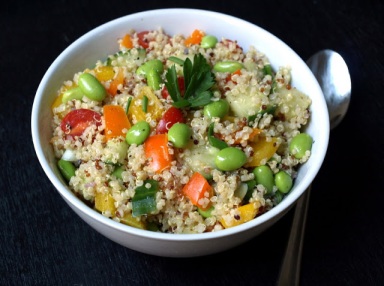
Another new favorite from The Simple Veganista, this quick and easy quinoa salad is filling and refreshing–perfect as a dinner side dish or a light lunch!  I didn’t have any edemame (soy beans) when I made mine, but since they are packed full of protein I definitely recommend adding them if you can.

If you’re not familiar with quinoa, it’s an amazing whole grain that doesn’t take long to prepare (I find it faster than rice) and gives you complete proteins–the only whole grain to do that by the way.  Just be sure to rinse yours first if you don’t purchase the pre-rinsed kind.  The outer layer can be bitter tasting, which can ruin the whole dish.

The zesty dressing can be made and used on regular salads as well.  I made a second batch for my spinach lunch salads all week. Yum!

Garden Quinoa Salad w/Zesty Garlic Dressing
 
Salad
  • 1 cup quinoa
  • 1 1/2 cups water
  • 1 cup edemame (optional)
  • 1 cup english cucumber, chopped
  • 1 cup yellow bell pepper, chopped
  • 1 cup orange bell pepper, chopped
  • 1/2  cup grape or cherry tomatoes, sliced in half
  • 1/2 cup green onions, thinly sliced

Dressing
  • 4 garlic cloves, minced
  • juice of two medium lemons
  • 3 rounded tablespoons stoneground or dijon mustard (I used stoneground)
  • 2 tablespoons extra virgin olive oil
  • himalayan salt, to taste
  • cracked pepper, to taste

In a medium size pot, add quinoa and 1 1/2 cups water, bring to a boil, cover, reduce heat and simmer for 15 minutes. Once done, remove cover and let stand 5-15 minutes, until all water is absorbed, then fluff with a fork.

While quinoa is cooking, combine all the dressing ingredients in a small bowl, taste for seasoning and let set.

Chop and dice your remaining vegetables, except the edemame. Place chopped vegetables and edemame in a large bowl, add the dressing tossing gently to coat.

Once ready, add quinoa to the vegetables and toss together. Serve with a little more sea salt & cracked pepper and squeeze of lemon on top.